

How to Tarp a Roof in 8 Steps? (Expert Tips)
When severe weather strikes, quick action can prevent minor roof damage from turning into a major problem. Heavy winds, hail, and falling debris can tear shingles or expose your roof to leaks. That’s when knowing how to tarp a roof becomes an essential skill for homeowners. Properly covering your roof after a storm helps protect your home until professional repairs can be made.
If your home in Peoria Heights and surrounding areas has recently experienced storm damage, acting fast can make all the difference. To better understand emergency roof protection and professional repair options, explore our storm damage restoration page for details on how our experts can help you recover quickly and safely.
Here’s what you’ll learn in this guide:
- Why tarping a roof matters after storms or sudden damage
- Step-by-step instructions on how to tarp safely and securely
- The tools and materials you’ll need for the job
- Tips to avoid common mistakes that cause further damage
- When to call professionals for help
Why Tarping Your Roof After Damage Is So Important
A damaged roof can leave your home vulnerable to leaks, interior water damage, and even structural issues. While it’s always best to call a professional roofer for permanent repairs, a temporary tarp can buy valuable time and prevent further destruction.
Here’s why tarping your roof immediately after a storm is essential:
- Prevents Water Damage: A securely fastened tarp stops rainwater from entering your attic and damaging insulation, walls, and ceilings.
- Protects Against Mold: Moisture inside your home creates the perfect environment for mold and mildew to grow, which can be harmful to your health.
- Preserves Structural Integrity: Keeping your roof deck dry prevents wood rot and helps maintain the strength of your home’s frame.
- Avoids Costly Repairs: Acting quickly can save you thousands in potential repair costs from unchecked leaks.
- Helps with Insurance Claims: Installing a tarp demonstrates that you took immediate action to mitigate damage, which can strengthen your insurance claim.
8 Steps to Tarp a Roof
While it may seem straightforward, tarping a roof requires caution, the right tools, and proper technique. Follow these eight expert steps to safely and effectively secure your roof until a professional can perform a full repair.
1. Inspect the Damage Safely
Before you begin, assess your roof from the ground or use binoculars to get a closer look. Never climb onto a wet or unstable roof without proper safety gear.
Look for:
- Missing or lifted shingles
- Exposed roof decking or plywood
- Damaged flashing around chimneys or vents
- Fallen tree limbs or debris
If the damage looks severe or structural, avoid climbing onto the roof and contact a professional immediately. Homeowners in Peoria Heights and surrounding areas should prioritize safety first.
2. Gather the Necessary Materials
You’ll need a few key items to properly tarp your roof:
- A heavy-duty waterproof tarp (large enough to cover the damaged area plus extra overlap)
- Roofing nails or screws
- 2×4 wooden boards
- Hammer or screw gun
- Utility knife or scissors
- Gloves and non-slip shoes
- Ladder and safety harness (for steep or high roofs)
Always choose a tarp made from durable polyethylene or vinyl designed for outdoor use. Thin plastic sheets or painter’s tarps won’t hold up against rain and wind.
3. Clear Debris and Dry the Area
Before laying down a tarp, remove any debris such as branches, leaves, or loose shingles. This ensures the tarp lies flat and forms a watertight barrier.
Use a broom or leaf blower to clear the surface, and make sure the area is dry. If the roof is slippery or unstable, stop and wait until conditions improve.
4. Measure and Cut the Tarp
Your tarp should extend at least 3 to 4 feet beyond the damaged section on all sides. This extra overlap ensures full coverage and allows space to secure the edges properly.
Cut the tarp to size using a utility knife or scissors, and double-check the fit before fastening it in place.
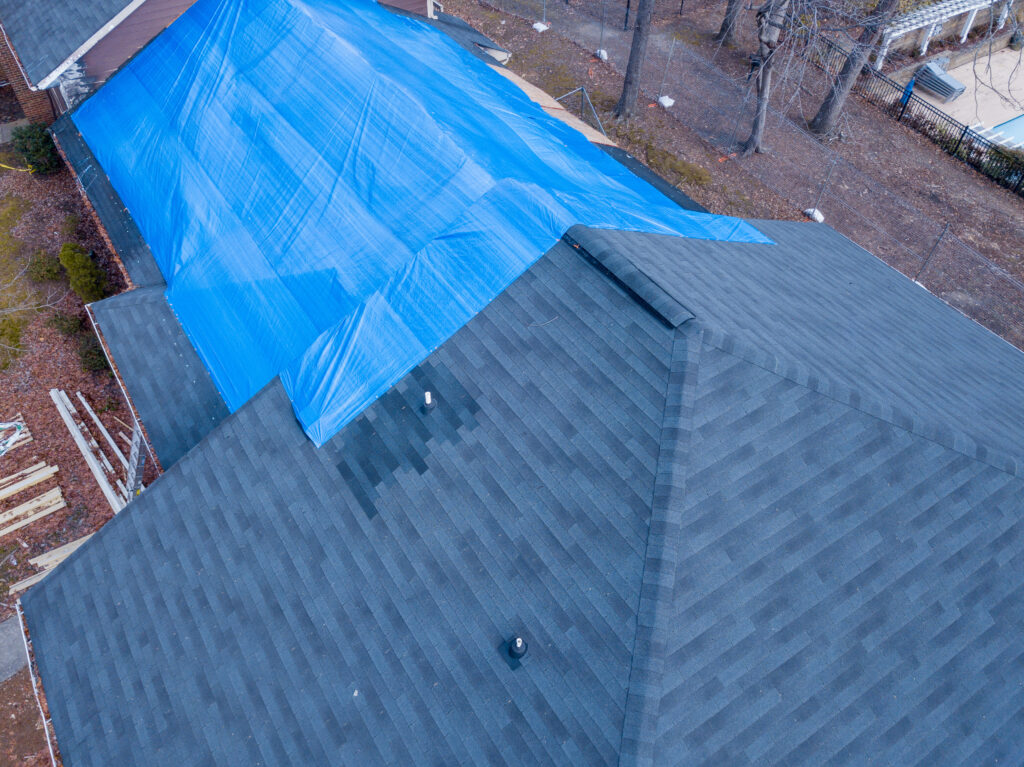
5. Position the Tarp Correctly
Place the tarp so that it fully covers the damaged section and overlaps the roof ridge if possible. Position it lengthwise so that water naturally flows down the tarp rather than seeping underneath it.
If you’re covering an area close to the roof’s peak, extend the tarp slightly over the ridge to prevent water from sneaking under the top edge.
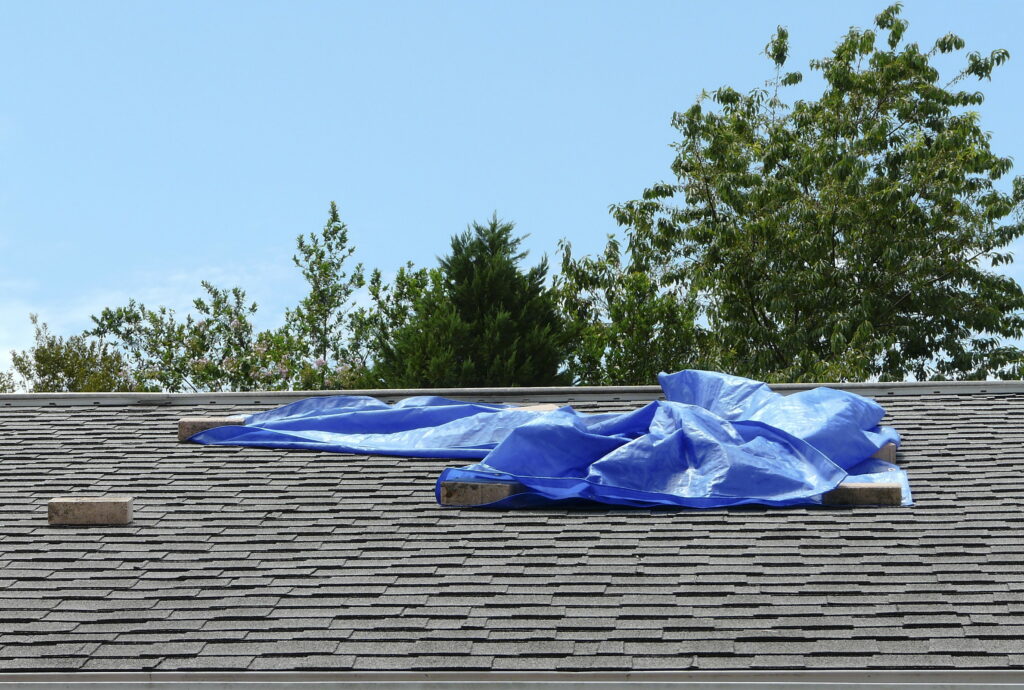
6. Secure the Tarp with Wooden Boards
To prevent wind from lifting the tarp, use 2×4 boards to anchor the edges securely.
Here’s how:
- Roll one end of the tarp around a board and nail or screw through both the tarp and board into the roof.
- Repeat this process on the opposite end, pulling the tarp tight to eliminate wrinkles.
- Attach additional boards along the sides of the tarp for extra reinforcement.
The wooden boards distribute pressure evenly, reducing the risk of tearing during high winds.
7. Double-Check for Gaps or Loose Edges
Once the tarp is secured, walk around your property and visually inspect it from different angles. Make sure no edges are flapping or sections are left uncovered.
If necessary, use additional nails or screws to tighten the tarp. A properly installed tarp should look smooth and taut, without sagging areas that can collect water.
8. Monitor the Tarp and Schedule Professional Repairs
Tarping your roof is only a temporary fix. A tarp can provide protection for a few weeks, but it’s not a long-term solution.
After installation:
- Check the tarp regularly, especially after strong winds or rain.
- Replace it immediately if you notice tearing or loosening.
- Contact a roofing professional as soon as possible to assess permanent repairs.
Professional inspection ensures that underlying damage is addressed and prevents future leaks or structural issues.
Pro Tips for Safe and Effective Roof Tarping
Even though tarping seems like a straightforward DIY task, following a few extra precautions can make your repair safer and more effective.
- Wait for Safe Weather: Never attempt to tarp a roof during an active storm or strong winds.
- Use Quality Materials: Heavy-duty tarps and galvanized nails or screws provide stronger protection.
- Work with a Partner: Having someone hold the ladder or hand up tools makes the job safer and more efficient.
- Avoid Walking on Steep Roofs: If your roof has a steep pitch, it’s best to call a professional with proper equipment.
- Document the Damage: Take clear photos of the affected area for insurance purposes before covering it.
Common Mistakes to Avoid When Tarping a Roof
Even with good intentions, homeowners sometimes make mistakes that can worsen roof damage. Avoid these common pitfalls:
- Using an Undersized Tarp: A tarp that’s too small leaves parts of your roof exposed to water and wind.
- Failing to Overlap Properly: Always allow at least 3 feet of overlap on each side of the damaged area.
- Nailing Directly Into Damaged Sections: Secure tarps on solid areas of the roof to prevent additional leaks.
- Ignoring Safety Precautions: Lack of harnesses or working on wet surfaces can lead to serious injuries.
- Leaving Tarps for Too Long: Extended exposure to sun and wind can cause the tarp to deteriorate, leading to more leaks.
Comparing Temporary vs. Permanent Roof Protection
| Feature | Temporary Tarp | Permanent Repair |
| Purpose | Short-term protection | Long-term solution |
| Duration | 2–6 weeks | 20+ years (depending on material) |
| Cost | Low initial cost | Higher upfront investment |
| Protection Level | Prevents immediate leaks | Restores full roof integrity |
| Maintenance | Requires regular checks | Minimal after installation |
While a tarp is excellent for immediate damage control, it should never replace professional roofing services. Once the weather clears and safety allows, schedule a complete inspection to identify all problem areas.
When to Call a Professional
If your roof damage involves structural issues, large holes, or widespread shingle loss, it’s time to call the experts. Professional roofers have the training, equipment, and materials to restore your roof safely and efficiently.
Contact a professional if:
- The damaged area covers more than 20% of your roof.
- You’re unable to reach the roof safely.
- The roof has sagging or visible structural damage.
- Leaks persist even after tarping.
Roofing professionals in Peoria Heights and surrounding areas can inspect the extent of the damage, provide accurate repair estimates, and install a durable solution to protect your home long-term.

Keep Your Home Protected with ROOF TIGER
When storms strike, your roof is the first line of defense against the elements. Knowing how to tarp a roof gives you the power to take immediate action, protecting your home and family from costly water damage. But once the skies clear, professional repairs are essential for long-term peace of mind.
The experts at ROOF TIGER proudly serve homeowners in Peoria Heights and surrounding areas, delivering fast, reliable storm restoration services that restore strength and safety to your roof. From emergency tarping to full replacements, our team ensures every home receives the care it deserves.
If your roof has sustained damage or you need immediate assistance after a storm, don’t wait—contact us today to schedule your inspection or storm repair service.


Ferocious Roofing

They are extremely professional and responsive, made some great suggestions along the way, and handled every little issue that came up without complaint.