

Siding Installation: Process, Materials & What to Expect
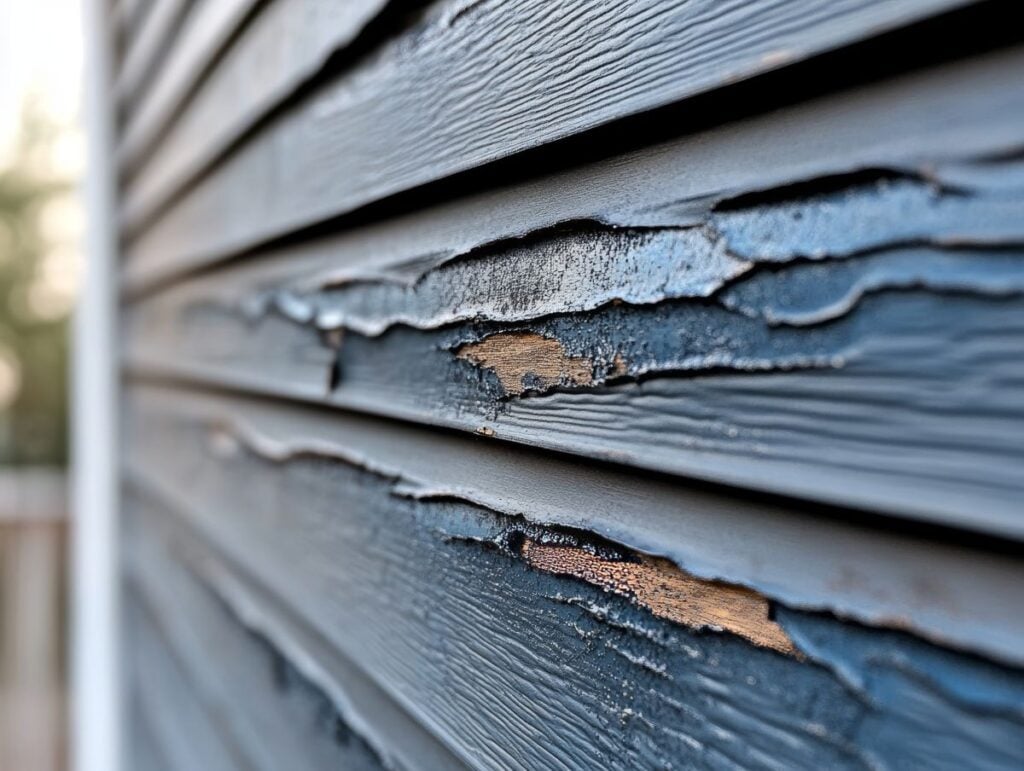
Your home’s exterior takes a beating year after year, and when siding begins to fail, the effects go far beyond appearance. Siding installation is one of the most impactful upgrades a homeowner can make, protecting the structure from moisture, improving energy efficiency, and dramatically boosting curb appeal. Whether you are replacing worn panels or starting fresh, understanding what the process looks like helps you move forward with confidence. If you are exploring your exterior options, this overview of what proper siding work involves can help you understand the full scope before your first contractor conversation.
What you’ll learn in this post:
- Why new siding is one of the highest-return home improvements available
- The step-by-step installation process from inspection to cleanup
- How the most common siding materials compare in cost, durability, and maintenance
- What to watch for when evaluating contractor quality
- How to prepare your home before installation day
Why New Siding Is Worth the Investment
When homeowners in Washington and surrounding areas think about exterior upgrades, siding often gets treated as a cosmetic decision. In reality, siding functions as your home’s first line of defense against the elements, and its condition directly affects energy costs, structural integrity, and resale value. It is also worth noting that siding acts as a rainscreen, not a waterproof layer, which is exactly why what goes behind the panels matters as much as the panels themselves.
- Energy efficiency: Old or improperly installed siding allows outside air to infiltrate your exterior walls, forcing your HVAC system to work harder. New siding paired with a quality weather resistant barrier dramatically reduces this problem.
- Moisture protection: Water intrusion behind failing siding leads to mold, rot, and structural damage that can cost far more to remediate than a proactive replacement.
- Curb appeal and resale value: According to industry research, siding replacement consistently ranks among the top exterior upgrades for return on investment, often recouping 70 to 80 percent of project costs at resale.
- Reduced maintenance: Modern siding materials, including premium options like James Hardie fiber cement, are engineered to resist fading, warping, and pest damage, which means fewer repairs and touch-ups over the years.
New siding is not just about looking good from the street. It is about protecting everything behind it, keeping energy bills manageable, and making sure your home holds its value for the long term. Homeowners who invest in quality materials and professional installation typically see those benefits reflected the moment the project wraps up.
6 Steps in the Siding Installation Process
The installation process involves far more than nailing panels to a wall surface. A professional job follows a deliberate sequence designed to maximize performance and longevity, and a typical siding installation takes 7 to 14 days from start to finish, though complex rooflines can extend that timeline. Understanding each stage helps you set realistic expectations and ask the right questions during your estimate.
1. Initial Inspection and Scope Assessment
The first step before any materials are ordered is a thorough assessment of your existing exterior. A qualified contractor will check for moisture damage, rot, pest activity, and any structural issues that need to be addressed before new siding goes on. This is also the time to measure wall height and width to estimate material quantities and identify any downspouts, shutters, or accessories that will need to be removed before work begins.
- The contractor should document any areas of concern on the exterior walls
- Rotted sheathing or framing must be replaced prior to installation
- Window, door, and soffit trim conditions are evaluated at this stage
2. Material Selection and Ordering
Once the scope is clear, you will select your siding material, profile, and color. Lead times vary depending on the product, so this step should happen well before your target installation date. Your contractor should walk you through the pros and cons of each option relative to your home’s style, your climate, and your budget.
- Vinyl, fiber cement, engineered wood, and natural wood are the most common choices
- Corner posts, j channels, utility trim, and fascia accessories should all be ordered together for a consistent finish
- Premium products may have longer lead times, so plan accordingly
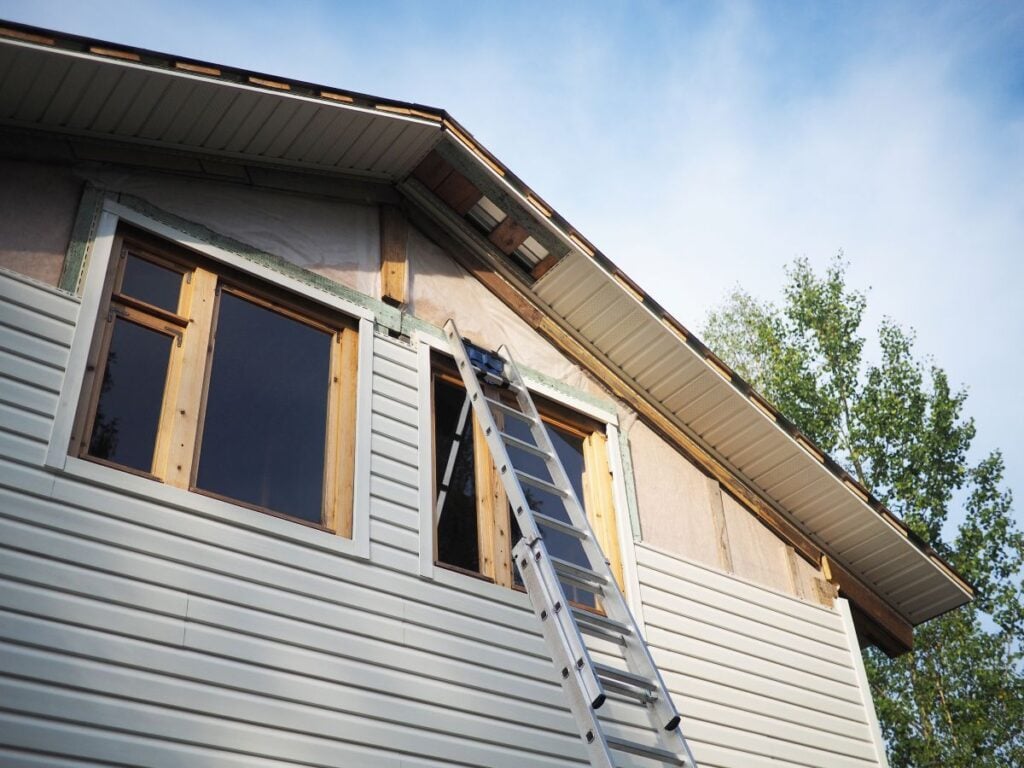
3. Removal of Old Siding
In most cases, the old siding is removed entirely rather than covered over. This allows the crew to inspect the sheathing underneath, address hidden damage, and ensure the new installation sits flush against a flat surface. Washington and surrounding areas see enough moisture and temperature swings that layering over existing siding is generally not recommended.
- Debris is typically hauled away by the contractor
- Exposed sheathing is inspected and repaired as needed; furring strips may be added if the wall surface is uneven
- This is the stage where hidden problems most often surface
4. House Wrap and Moisture Barrier Installation
Before any new panels go up, a weather resistant barrier is installed over the sheathing to create a continuous layer of protection across the exterior walls. This layer is critical because siding is designed as a rainscreen, not a watertight seal. It allows moisture that gets behind the panels to drain out rather than sitting against the wood. Flashing is installed around windows, doors, and other openings at this stage to direct water away from vulnerable transitions.
- House wrap overlaps should run shingle-style to direct water down and out
- All seams and edges are taped to prevent air infiltration and protect the nailable surface beneath
- Installing flashing correctly around windows, doors, and the garage is one of the most detail-sensitive parts of the project
- Flashing details are among the most common failure points in poorly executed jobs
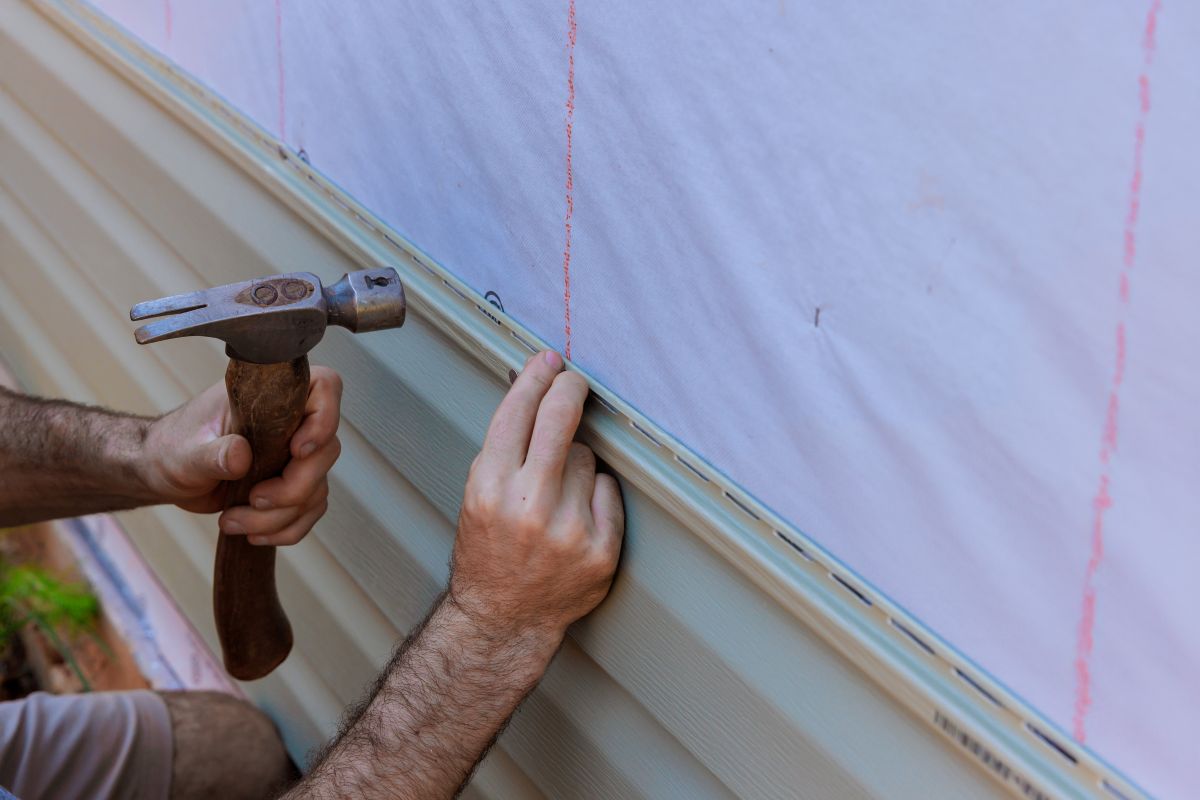
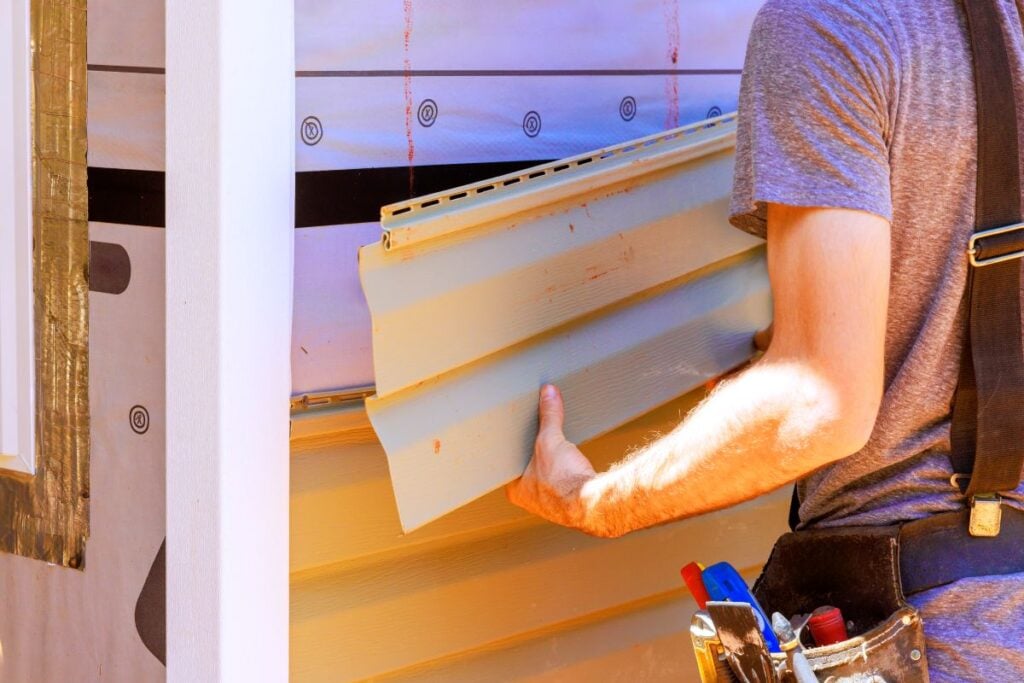
5. Panel Installation
With the substrate prepared, the crew installs siding panels starting at the lowest point of each wall and working upward. A chalk line is snapped to set the starter strip level, corner posts are placed, and j channels are fitted around windows and other openings before panels go up course by course.
Vinyl siding must never go directly over studs. Fasteners need to penetrate at least 1 1/4 inches into a solid, nailable surface. Nailing through the center of each nail slot (not the top or bottom edge) lets panels expand and contract freely, since vinyl can shift up to 1/2 inch over 12 feet as temperatures change. Panels nailed too tightly will buckle. Expansion gaps at corners, trim, and transitions are not optional. Cuts are made with a circular saw or tin snips, and panels should overlap about 1 inch per manufacturer specs.
- Starter strips establish the reveal across the entire base of each wall
- All cuts around windows, doors, and the garage must be precise and caulked
- J channels and utility trim frame every opening cleanly
- Use aluminum or stainless steel fasteners for vinyl siding to prevent corrosion
6. Final Inspection and Cleanup
A professional crew walks the entire exterior once installation is complete, checking for missed caulking, gaps, or panels that need adjustment. The job site should be cleared of debris and protective coverings before the crew leaves. Bad weather during installation can affect how caulks cure, so a thorough post-install inspection is especially important if conditions were less than ideal.
- Inspect for consistent reveal spacing across all courses
- Check caulking around all openings, penetrations, corners, and trim
- Confirm warranty documentation is provided for both materials and labor
Taking the time to review the finished product with your contractor before they leave protects you if anything needs adjustment. A reputable installer will welcome that walkthrough rather than rush past it.
How Siding Materials Compare
Choosing the right material is one of the most consequential decisions in any siding installation project. Each option comes with its own strengths, limitations, and price points, and the right choice depends on your home’s style, your local climate, and how much ongoing maintenance you are willing to take on. Homeowners in Washington and surrounding areas should weigh those factors alongside upfront and long-term costs.
Vinyl Siding
Vinyl remains the most widely installed siding material in the country for good reason. It is affordable, low-maintenance, and available in an enormous range of styles and colors. When installed properly, with correct nail placement in the center of each nail slot and appropriate expansion gaps at corners and trim, vinyl performs extremely well for decades.
- Cost: Generally the most affordable option per square foot
- Maintenance: Requires occasional washing; no painting needed
- Lifespan: 20 to 40 years depending on product grade and installation quality
Fiber Cement Siding
Fiber cement, most commonly associated with James Hardie, offers a premium look that closely mimics wood, stone, or stucco without the maintenance demands of natural materials. It is highly resistant to moisture, fire, pests, and impact. The tradeoff is higher material and labor costs, as fiber cement requires a circular saw with a fine tooth blade for cuts, and its weight makes installation more demanding than vinyl.
- Cost: Moderate to high, depending on finish and profile
- Maintenance: Requires repainting every 10 to 15 years
- Lifespan: 30 to 50 years with proper maintenance
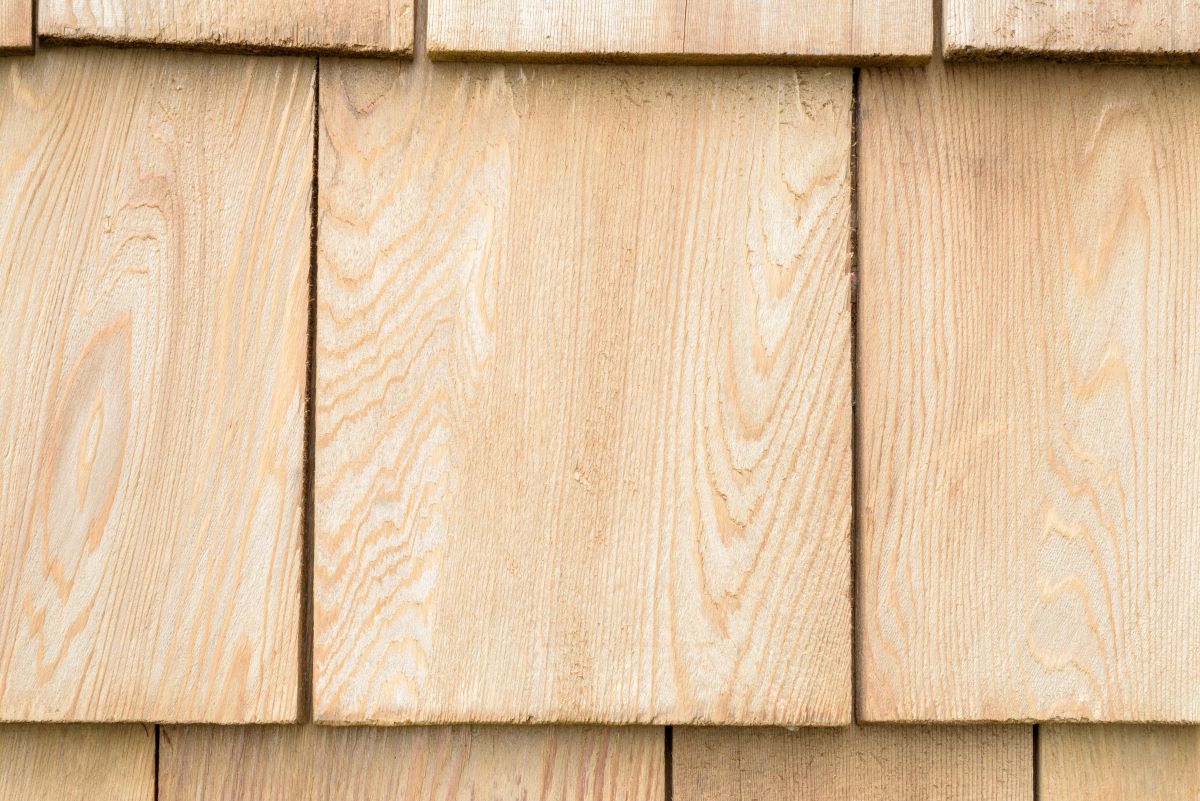
Engineered Wood and Composite Siding
Engineered wood and composite siding deliver the warmth of real wood at a lower price point with better dimensional stability. Composite options have improved considerably in recent years, typically lasting over 25 years with solid eco-friendly credentials. Both types are treated for moisture and pest resistance, though they require more upkeep than vinyl or fiber cement.
- Cost: Mid-range, typically between vinyl and fiber cement
- Maintenance: Requires periodic painting and caulk inspection
- Lifespan: 25 to 30 years with consistent upkeep
What to Look for in a Siding Contractor
Material selection only matters if the installation is done correctly. Even the best siding will fail prematurely if the crew rushes through flashing details, skips proper house wrap lapping, or nails vinyl panels too tightly in warm weather. Knowing what separates a quality contractor from a cut-rate operation protects your investment and ensures the project is covered by meaningful warranties.
Licensing and Insurance
Any contractor working on your home should carry current general liability insurance and workers’ compensation coverage. Request certificates before work begins. A contractor who hesitates to provide these documents is a red flag.
Manufacturer Certification
Many premium siding manufacturers, including James Hardie, offer certified installer programs that require contractors to demonstrate proper installation techniques. Choosing a certified installer often comes with enhanced warranty coverage and ensures the crew is trained on the right methods for that specific material.
Written Scope and Warranty
A professional estimate should include a detailed written scope of work specifying materials, the extent of substrate repairs, and warranty terms for both labor and product. Homeowners across Washington and surrounding areas who review written contracts before signing are far less likely to encounter surprises mid-project.
Choosing a contractor based solely on price is one of the most common and costly mistakes homeowners make. The lowest bid frequently reflects corners cut on house wrap, flashing, or substrate prep. A slightly higher investment in a qualified crew pays for itself many times over.
Start Your Siding Project with ROOF TIGER
Your siding does more than make your home look great. It protects your structure, controls energy costs, and reflects the care you put into your property. Whether you are dealing with aging panels, storm damage, or simply ready for a fresh look, working with an experienced contractor makes all the difference between a result that lasts and one that needs attention again in a few years. ROOF TIGER brings the expertise, materials knowledge, and workmanship to ensure your installation is done right from the first nail to the final inspection. When you are ready to move forward, contact us today to schedule your consultation.

Ferocious Roofing

They are extremely professional and responsive, made some great suggestions along the way, and handled every little issue that came up without complaint.